So I'm nearing the deadline for this semester's final project. School blesses me with this nice old SFTP server that doesn't support installing modules. Deploying on this can be as cumbersome as manually dragging files & folders in Transmit, but there is a way around, and it works for most similar cases.
Understanding the flow
So the whole flow relies on using git and using it's branching feature to determine what content the server is going to receive. Following the Git branching model you'll want your master branch of your repository to always represent a production-state product. This is what we're going to deploy.
It is possible to deploy any other branch though, and principles stay exactly the same. This way you could let's say automatically deploy to a staging server from your develop branch. This article won't really go in depth for each specific branch and will just focus on deploying your master as a final product.
Here's a quick overview of how our complete flow will look like in the end:
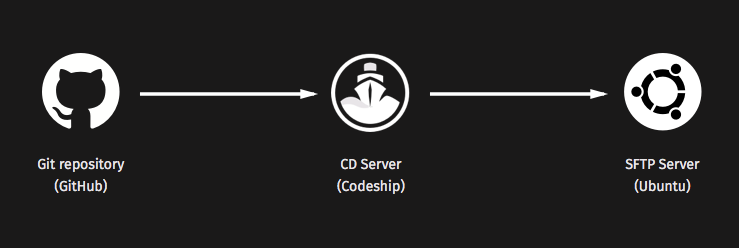
Now each point in the flow stays the same but the tools used for them are independent of this flow, you could easily switch out Github for BitBucket or Codeship for your own bash scripts. Actually deploying your product will happen trough rsync if you're connecting over sftp, and lftp if you're connecting over ftp (not recommended!). Again you could use other programs, these are just presets that Codeship has at their end to make our life easier.
Setting up your Git repository.
So when you've git init-ed a repo and linked it to your Github repo as a remote there's little stuff to adjust in this step. I like to add in a special ignorefile so Codeship knows which files to disregard when looking for files to send to the server. It's just a regular plain text file which we will later read from:
console# In project root, create the ignorefile:touch .codeshipignore# Add the files & folders to ignore:echo -e "node_modules\n.git\npackage.json" > .codeshipignore# Add and commit the file to the repogit add .codeshipignoregit commit -m "Ignorefile for Continuous Deployment"
You may want to wait with actually pushing the local git repo to your remote Github repo, since Codeship will only deploy on a push. I made the mistake of integrating this flow halfway trough my project which made my server lacking behind my code, since I was still working on a develop branch. I think it's a better idea to deploy on the first push of your codebase.
So with development of the product done and the ignore set up, we'll move over to handling the CD server, Codeship
Setting up Codeship as our CD server
You'll want to start with signing up for an account with Codeship. In our case we will be using Github repos so it's a good idea to use your Github account to sign up, that way all of our repos will be available immediately after the signup!
Find the create new project button and select the SCM (Github). Codeship will pull in a list of your Github repositories, select the project here. The next step will handle some basic testing stuff.
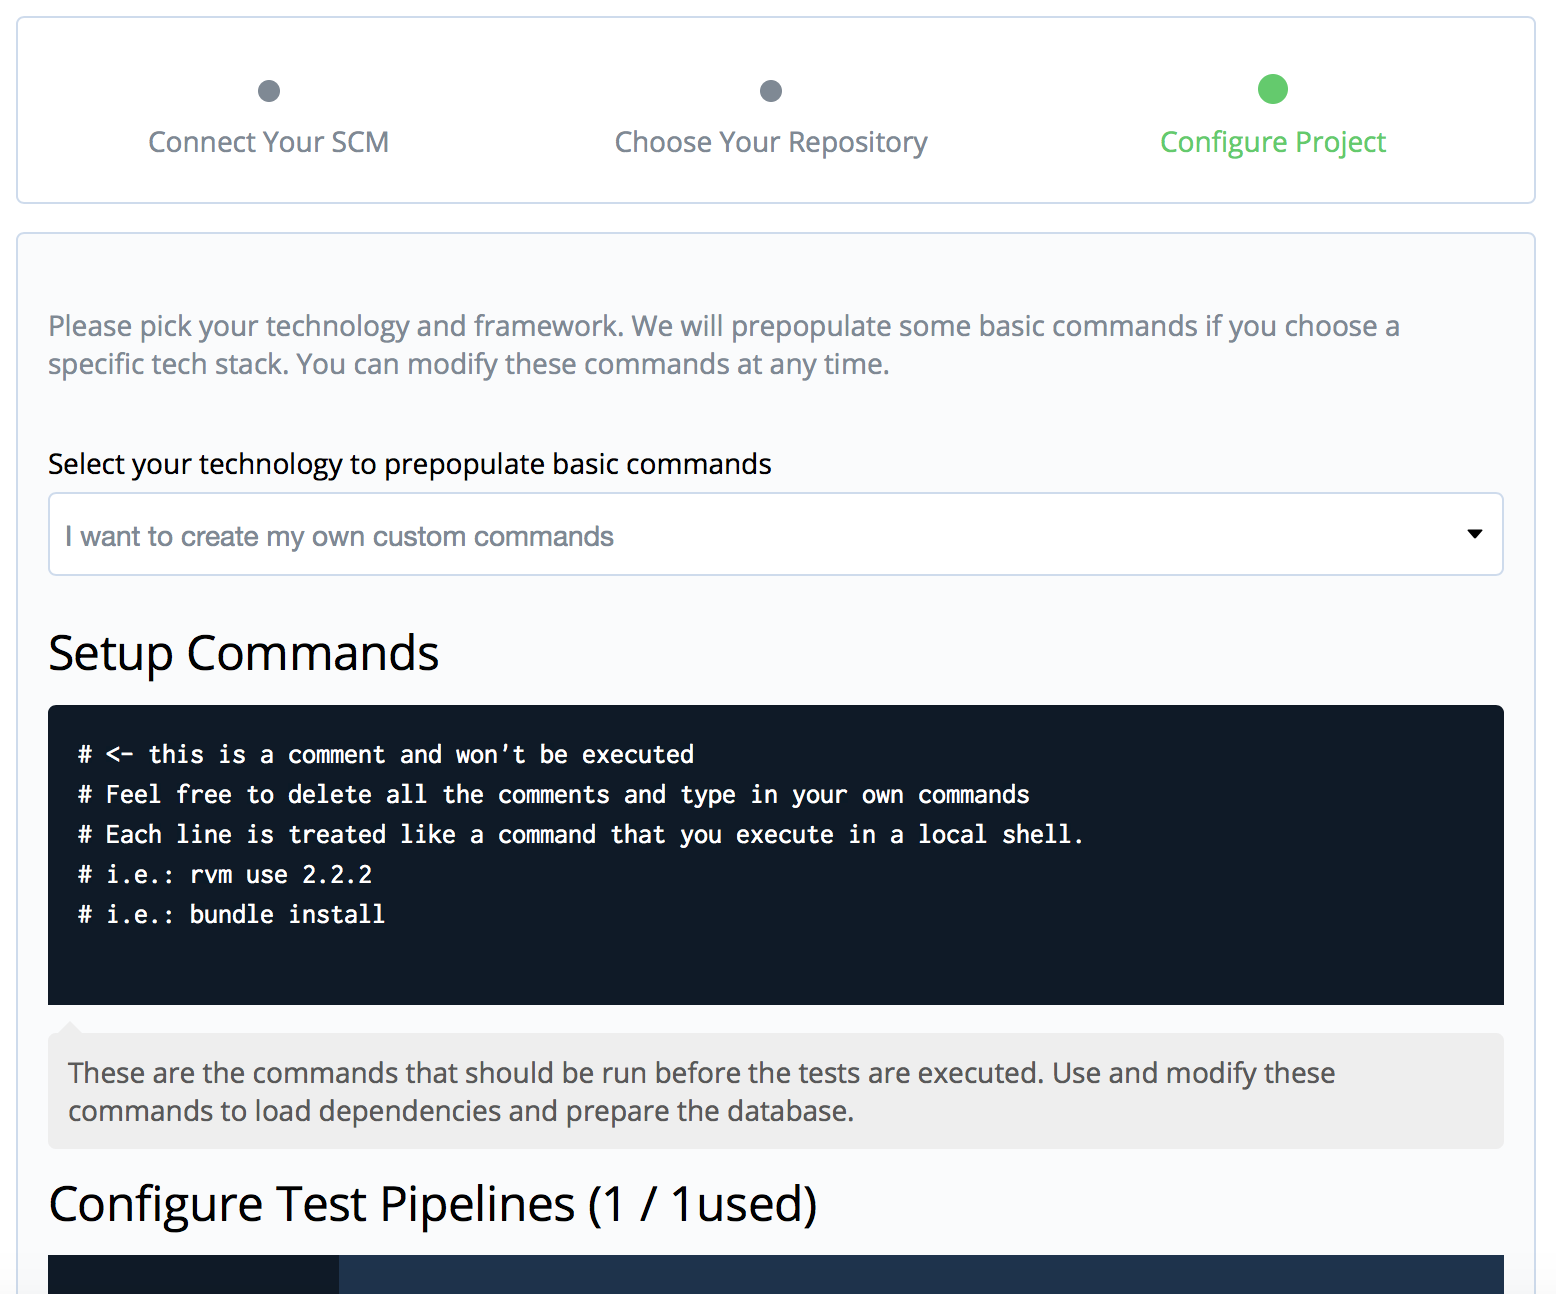
Codeship offers some presets for today's most common frameworks, engines and compilers. If you're project uses one of these it's recommended to pick it from the list. My project is based on Node.js but I do want to adjust some things here, like my node version, before I get started.
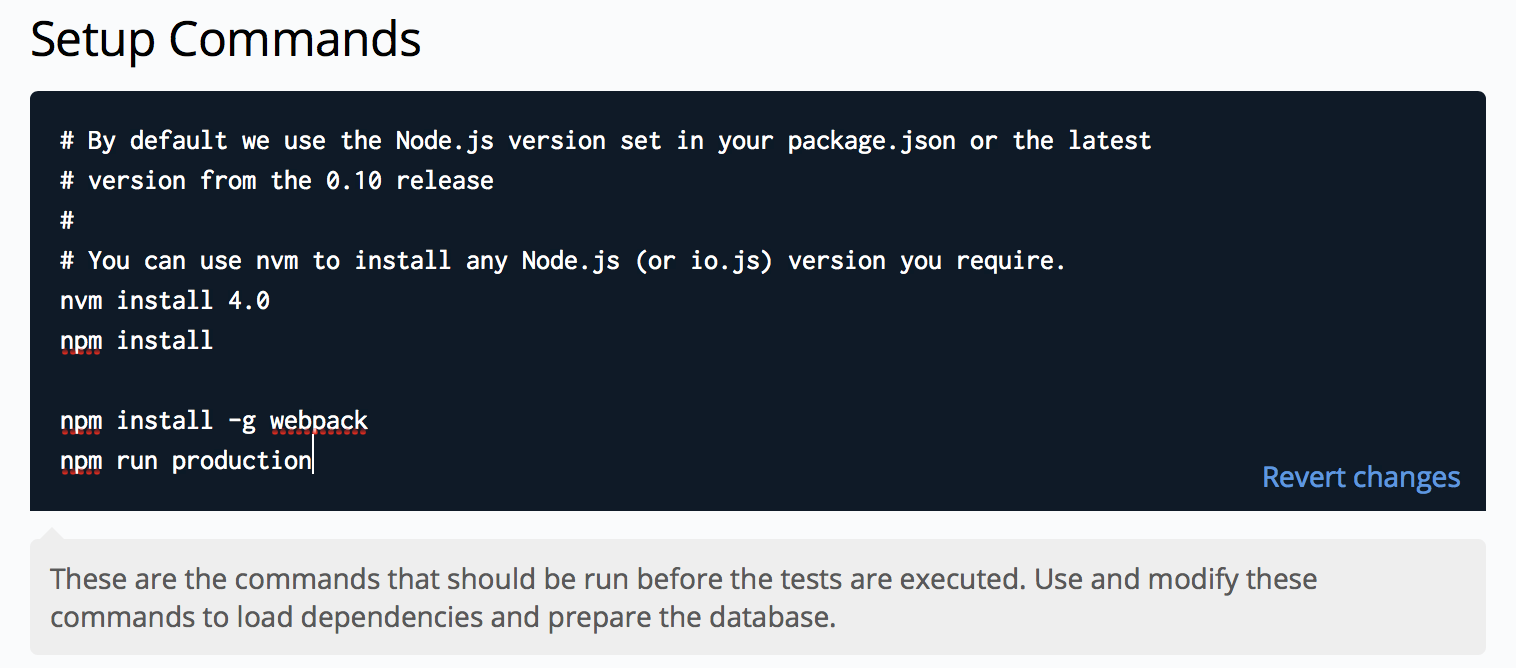
Codeship does a great job at explaining what everything does. They offer a lot of great tools, like nvm and rbenv, to easily give you the same environment as you were locally working in. The Setup Commands will take care of installing the correct environment and building the project on Codeship's servers. In my case I needed node v4+ (and though it reads from package.json I manually specified it here) and webpack installed globally, since this is my build tool of choice.
If you write tests there is the Configure Test Pipelines field for that. Codeship won't build your product if the tests break the build. This way you can be sure that the deployed product will 'always' be bug-free.
Hit save and you'll be taken to the dashboard were your first build will start after a push. Don't push yet though, we will want configure the deployment settings first, so that our first push immediately goes out to the server. Hit the Project Settings on your repo's dashboard and click Deployment.
We can now configure the pipelines for our product. Here it's possible to add extra pipelines for other branches. Fill in the field with 'Branch is exactly' with master and hit save. You'll be presented with some preset options like Heroku or AWS CodeDeploy but we want to deploy to older, regular FTP servers so we'll need to configure a Custom Script.
The script executes in a shell so it's not limited to just bash. The Codeship Docs offer an extensive explanation of what commands are available to this shell. We want to deploy to an SFTP server and the best way to do so is with rsync (regular FTP users will want to use lftp here). Rsync does a great job of versioned syncing while maintaining security, over SSH in this case. The script below is a one-liner, but here's some explanation to it:
consolersync -av --exclude-from '~/clone/.codeshipignore' ~/clone/ user@server:/path/to/end/folder# Plain english: use rsync in archive mode to clone source to destination at path, ignore everything from given file, and be verbose about it.
Codeship clones your project to a folder called clone in Codeships VM's home directory. This is the source.
We're using the flags
-avto make sure all files are sent in archive mode and the output is verbose.Our
.codeshipignorefile will let rsync know what files & folders to ignore when cloning from source to destination.Authenticating is done trough SSH. If no path is provided this will just go in the home directory, same as when manually ssh'ing from a shell. Mine needed to go to a path so you can easily append it to the server with a colon (:).
Ok, so now the hard work is done! It takes quite some time if you're setting it up the first time but the settings are practically the same for each project you need to deploy to a SFTP server.
So now is the time to push. Make sure all your changes are committed and you added the ignorefile. When the push is received on Github it'll go trough to Codeship and start building there. Go back to the dashboard were you should see your build running.
Click it and you'll get a neat overview of what task the server is running and whether the build succeeds or breaks.
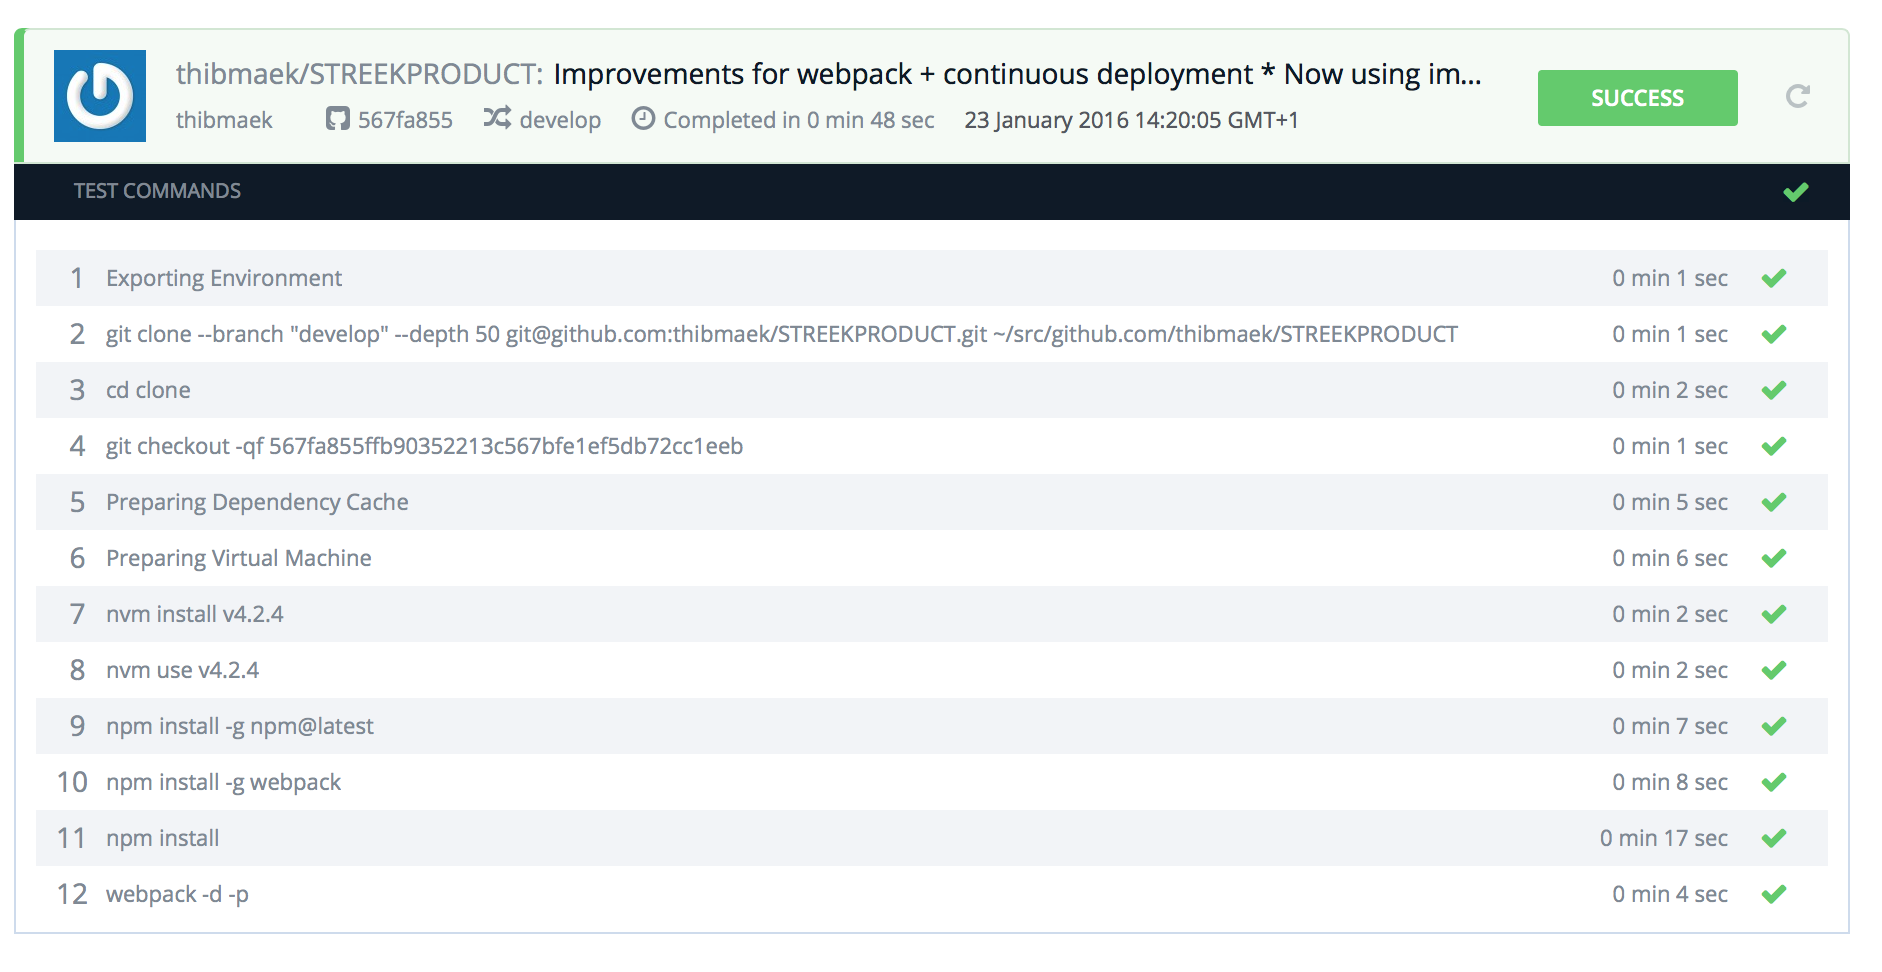
If you're pushing directly to master (you shouldn't though) or merging from develop and you visit your server's IP or domain you should see the exact state as your local app. Take a minute here, sit back & relax, and pop a bottle of champagne: you're life just became a lot easier. (Or your development flow at least…)
If you're having trouble with sending content to the server it could be because your server only connects via SSH keys. In this case open the project dashboard and open 'Project Settings > General Settings'. Copy the public key for your project and paste it manually into
~/.ssh/authorized_keyson your server.